If you’re handy and want a budget-friendly, customizable backyard set, the Swing‑N‑Slide Scout DIY kit gives durable hardware, two belt swings and a trapeze bar so you can build a compact or cantilevered setup to fit small yards. You’ll supply treated 4×4/4×6 lumber, galvanized fasteners, concrete anchors and follow illustrated steps with a torque wrench and level for safe assembly. Inspect and maintain brackets, clearances and surfacing regularly—keep going to learn full build, cost and safety details.
Some Key Takeaways
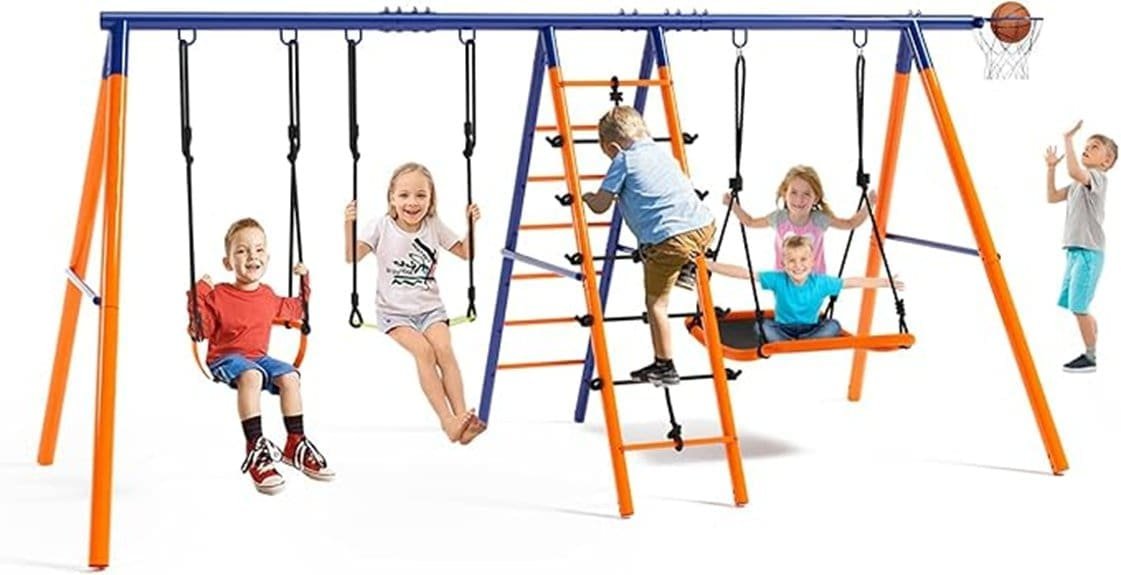
- Ideal for handy families seeking a customizable, budget-friendly backyard playset with durable metal hardware and two belt swings plus a trapeze bar.
- Requires purchasing lumber separately (4x4s, 4×6 beam, 2×4/2×6 pieces); follow kit’s lumber alternatives and use galvanized fasteners.
- Expect 4–8 hours assembly for two adults with drill-and-bolt steps; follow illustrated instructions, verify level/square, and torque bolts evenly.
- Performance is solid if beam/posts meet specifications; inspect brackets, tighten hardware seasonally, and maintain safe clearances and surfacing.
- Cheaper and customizable than prebuilt sets, but not suitable if you want a full-kit or commercial-grade equipment and warranty simplicity.
Quick Verdict : Who the Scout DIY Play Set Is Best For
If you’re handy and want a customizable, budget-friendly backyard set, the Scout DIY Play Set is a solid choice—you get durable hardware, two belt swings and a trapeze bar, plus clear instructions so you can safely build it to fit your space. You’ll like it if you’re a family builders project team who wants control over materials and layout. It suits small yards when you choose the compact assembly or cantilever option. Follow the instructions, use proper lumber and anchors, and routinely inspect connections. It’s not for those who need full kits or commercial-grade equipment. For peace of mind, consider using safety-grade hardware and following essential playset assembly tips to keep kids safe.
What’s Included and What Lumber You’ll Need
Because the Scout kit supplies only the metal hardware and swings, you’ll need to pick up the lumber and fasteners separately and follow the included diagrams closely to guarantee safe assembly. The kit includes brackets, a trapeze bar, two belted swings and fully illustrated instructions. For a three-position beam grab: 2x4x8 (1), 2x6x8 (2), 4x4x8 (4) and 4x6x12 (1); alternatives allow 4x6x16 or longer 2x6s—check instructions for options. Buy hot-dipped galvanized or exterior-grade screws and bolts. Keep installation tips handy and create a maintenance checklist to inspect fasteners, wood integrity and swing hardware regularly. Consider using galvanized hardware for the best corrosion resistance on outdoor playset components.
Assembly Experience and Dimensions (Step‑by‑Step Realities)
When you unpack the Scout kit and lay out the lumber, expect straightforward, drill-and-bolt assembly that rewards careful measuring and a methodical pace; follow the illustrated steps exactly and don’t rush torqueing the lag bolts or setting beam heights. You’ll stage tool placement nearby, mark cut and hole locations, and assemble subframes before final joining. Time estimates run 4–8 hours for two adults, less with experience. Check material finishing—sand edges, seal end cuts—before final installation. Use a torque wrench for consistent bolt torque, verify square and level regularly, and anchor posts per instructions for safe, lasting dimensions. For family backyards, plan layout and surfacing early to ensure playset safety and proper installation.
Performance, Safety, and Customization Options
Although you’re building a fun backyard centerpiece, you should prioritize performance and safety from the start: confirm your swing beam and posts are dimensioned and torqued per the instructions, inspect all brackets and hardware for tightness and wear, and keep clearance and fall zones free of obstacles and proper surfacing. Test stability under load and document durability testing results; rotate inspections seasonally for weather resistance issues like rust or wood swelling. Use user feedback to adjust seat height and spacing. For customization, plan attachments and upgrades while practicing space optimization to maintain safe clearances and balanced loads. Also consider using anchor kits to secure the playset to the ground and reduce tipping or shifting risks.
Cost, Alternatives, and Final Buying Recommendation
If you’re weighing cost against value, factor in the hardware kit price plus lumber, fasteners, and safety surfacing rather than looking at the kit price alone. Do a price comparison: add estimated wood (4×6 beams, 4×4 posts), screws, concrete, and rubber mulch or mats to the kit cost to see true outlay. Consider alternatives: prebuilt sets remove DIY labor but often cost more and limit customization. Check warranty details on brackets and swings; the manufacturer’s coverage matters for long-term safety. If you want customization and can follow instructions safely, the DIY kit is a sensible, economical choice. For durable builds, prioritize quality lumber like treated 4×6 beams to ensure longevity and safety.
Some Questions Answered
Does the Kit Include Anchoring Hardware for Ground Stability?
No, the kit doesn’t include ground anchors or concrete footings. You’ll need to provide anchoring hardware and choose whether to secure posts with ground anchors or set them in concrete footings for stability. Follow the included instructions and local building codes for safe installation, and use appropriate materials for residential use only. If you’re unsure, consult a professional to guarantee the play set is properly anchored and safe for children.
Can Additional Swings Be Added Later Without Structural Changes?
Yes — you can add swings later without major structural changes. You’ll stay within the kit’s swing capacity by using compatible hardware and following attachment compatibility guidelines. Swap or add approved gliders, toddler swings, or belt seats using the included brackets and appropriate lumber support. Always check weight limits, position spacing, and secure fasteners per the illustrated instructions, and inspect anchors and beams after any modification to maintain safety.
Is There a Warranty on the Hardware Components?
Yes — the hardware warranty covers defects in materials and workmanship for a limited period; check the manufacturer’s documentation for exact terms and duration. You should inspect components regularly to monitor component lifespan and replace any worn or damaged parts promptly. Keep receipts and register the product if required to maintain warranty coverage. Don’t ignore corrosion, bent brackets, or frayed straps — those signal safety risks and need immediate attention.
Are Replacement Parts Available if Something Breaks?
Yes — you can get replacement parts if something breaks. Check the replacement catalog or contact customer support to order hardware pieces, swing seats, or trapeze components; wood and fasteners aren’t supplied. You’ll want to inspect parts for wear, stop using damaged equipment, and replace broken items promptly to keep kids safe. Keep your purchase info handy when contacting customer support to speed the replacement process.
Can the Play Set Be Disassembled for Storage or Moving?
Yes — you can disassemble it for storage or moving, but you’ll need time and tools. Use the folding hinges and modular connectors to break the frame into manageable sections, remove swings and hardware, and label parts for reassembly. Follow the included instructions and keep all fasteners secure in a bag. Inspect lumber and brackets before reuse, and re-tighten all connections during setup to maintain safe play.